superbatman from pspmod posted this nice tutorial on how to add an extra analog stick to your PSP. IT was originally in three posts, but I've posted it in one. Here is the untouched, original guide:
Hey everyone out there!!! Ive looked around and seen a bit of people are
looking for a tutorial on the dual nub mod for psp fat. I was in the middle
of doing the dual nub mod and thought id make a writeup on it.
TOOLS
-soldering iron
-rosin flux(optional)
-dremel tool
-sanding wheel for dremel
-hot glue gun
-sand paper
-#000 phillips screwdriver
(whatever to get into the psp)
PARTS
-faceplate
-psp powerboard
-razor PCB(or Razor X)
-psp analog
-X button
-X button trace connector
thingy

Here is all the parts your gonna need for this mod(excluding the x-button and x-button thingy)

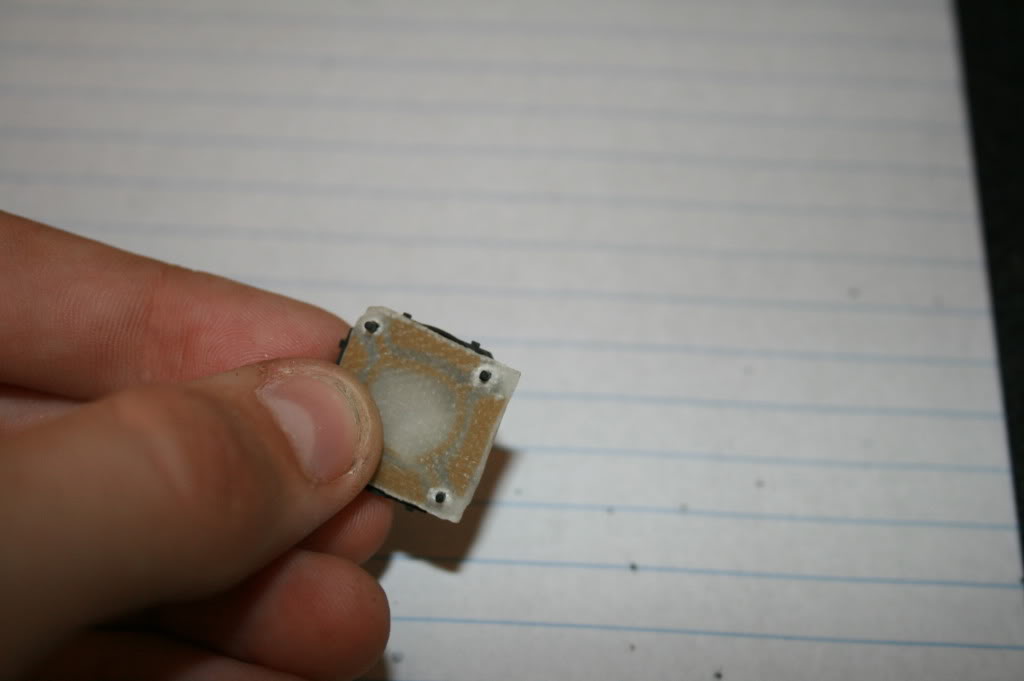
Straight away we are going to get down to dremeling the razor PCB(dont do this if using a
Razor-X)

Make sure you get it super thin, cause it will be a struggle to get the assembly to fit
Now, dissasemble your analog stick. Only keep the Top half of the analog assembly, the spring,
and the top and bottom part of the nub itself.

Now we are going to sand down the top part of the analog. Try to get it really thin, but
make sure you dont go through the plastic.(skip if you gotta razor-X)

Time to punch out the holes for the Top part of the analog to come together with the Razor PCB
(again, if you have teh razor-X, this is already done for you.)

There we go. All the holes are punched and the top and bottom halves can now come
together.

Get the spring all centered. I find the best way of doing this to be to hot glue the
nub to the top of the analog assembly right in the middle of the top of the assembly.
Then, mess around with the spring till it is centered. Then, remove the hot glue with your
finger or a flat head screwdriver, and your done!
Now, lets put the assembly together and test it all out.


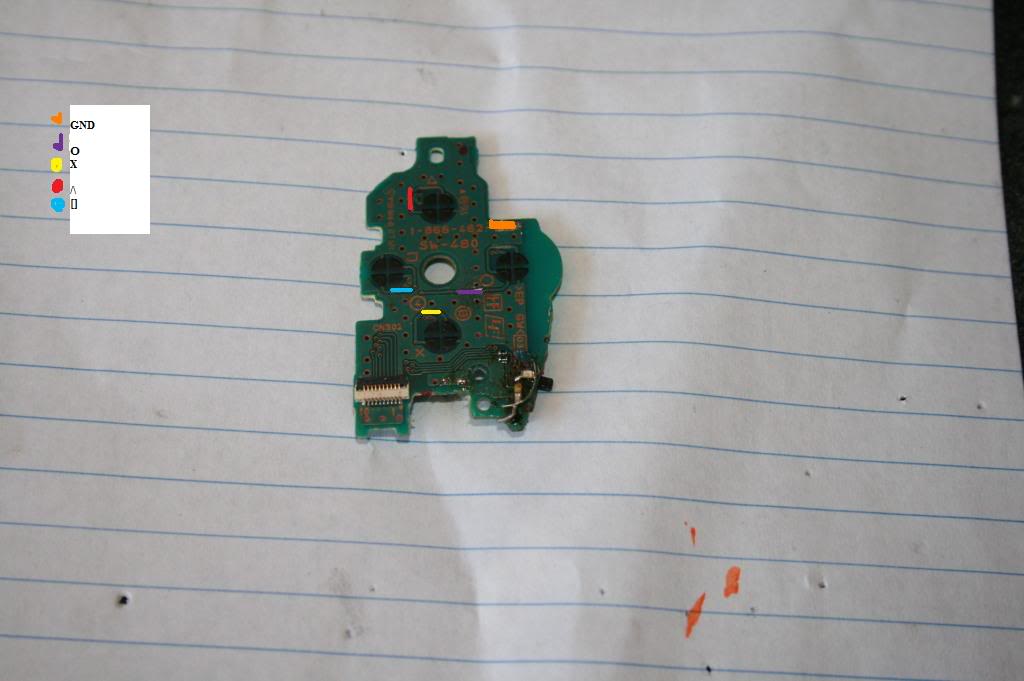
Ok, now here are the traces for all the buttons on a psp phat. If you are using a
slim, the traces will be different.
Solder on a wire about 1 inch long to each of the traces, and make sure you know
which one is which.
Now, lets get the Razor ready for soldering.

I use a stone-wheel dremel head to dremel just until i get to the copper, making
sure not to go too far.(Urggg... again, if you got a razor X, skip this.)
Ok, that is all for part one, the link to part 2 is at the top of the page. Im too lazy to
bring it down here, so scroll up with your mouse a bit and find it.

It should look something like this when you are done. There may be some minor deformation
on the copper traces on top of the razor, but none to big to hinder with the movement
of the nub.

There it is, all soldered up. Now lets assemble the rest of the nub.

There you go, now its time to mount it on the faceplate, yep your already there! =)

I used a spare razor and a golden marker to mark about were i was going to mount it.
As you can see, Ive already dremeled the X- button so the razor assembly would fit in,
and cut the X-button contact thingy so the razor assembly would fit in. You wont need
to dremel much, just make sure not to dremel off too much. The X-button will still work
and feel normally if you do it correctly.
Also, in the picture above, you will notice i dremeled out all the bumps and deformations
on the psp faceplate. I dont have a picture of were to dremel these things off, so im
going to use a french guys pictures.

As you can see, you will have to dremel a bit off of the faceplate to make it work.
I use a variety of dremel heads to get the job done.

I start with the smallest little drilling one, and move on to the other ones to get it the
right size.
Well, thats all i could fit on this page, ill have to put the rest in part 3. The link should
be at the top of this page
Start with a little whole, and gradually make it bigger til it is bigg enough to fit the
analog nub.

Little hole.

Done with making the hole, now just need to mount the whole assembly.

I mount it right where the corner is at the corner of the ZIF connector where the ribbon
cable for the HOME buttons goes in. I put a little bit of hot glue around it to hold it in
place.
Now, just put the psp back together and your done!!

I am using clamps to hold it together, cause im using a special glue to hold it together.
(I dont have it on yet, as im not done modding this psp yet. I still have a few mods to
do on it, fill you in when im done.)

There is what the thickness will hopefully be like if all the glue holds it good enough.
I still got a bit of cleaning up to do, then im right into the next mods. I might make a few more guides in the near futrue.
I hope this write up helped you a bit if you had any questions on the dual nub mod.
If you have any more questions, PM them to me, and ill try to get to them as soon as
possible.
Remeber to have fun Modding!!! 8^]
And the original guide: http://www.pspmod.com/forums/psp-hardware-guides/41921-how-dual-nub-mod.html
